If you want to learn how to get your dog to allow nail clipping, you’re in the right place. This article will guide you meticulously through each step, making nail clipping a straightforward and manageable task.
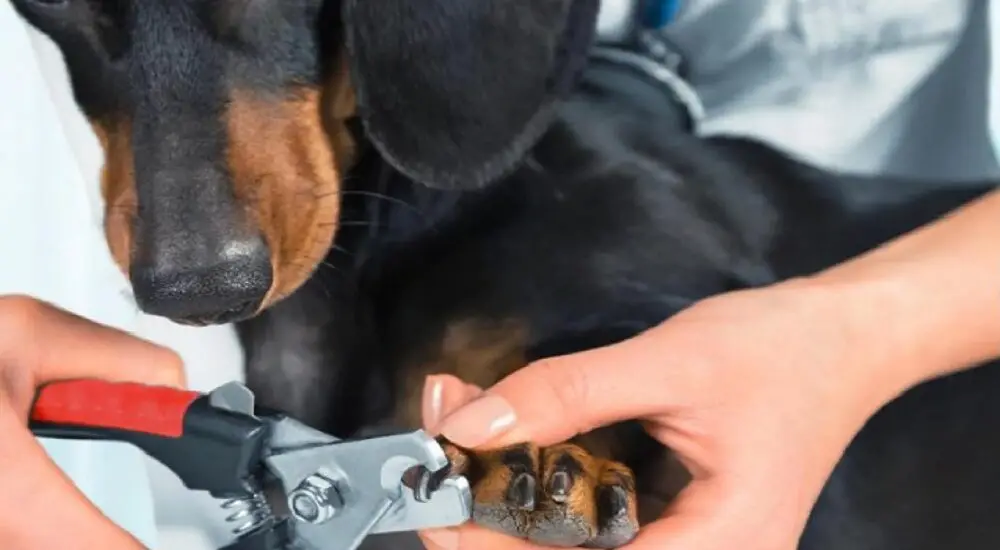
Table of Contents
Preparation
The first step in learning how to get your dog to allow nail clipping is preparation. Proper preparation not only sets the stage for a smooth clipping process but also eases any anxiety your dog may feel. Here’s how:
- Get Your Dog Comfortable: Let your dog sniff and explore the clippers. Pair this with treats and affection to create a positive association with the tool. This method of positive reinforcement can help reduce anxiety.
- Choose a Calm Environment: Opt for a quiet and comfortable space free from distractions. A familiar setting will help your dog stay calm, making the process easier for both of you.
- Time It Right: Aim to clip your dog’s nails when they are tired, perhaps after exercise. A worn-out dog is less likely to resist the process.
- Practice Touching Paws: Days before the actual clipping, touch your dog’s paws gently to get them accustomed to the sensation. This can make them less skittish when it’s time to clip.
Choosing the Right Tools
Equally crucial to knowing how to get your dog to allow nail clipping is the choice of tools. The wrong set of clippers can not only make the task difficult but may also risk injuring your pet.
- Guillotine-Style Clippers: These are best for smaller breeds. They are easy to use but may crush the nail if not sharp enough.
- Scissor-Style Clippers: These provide more force and are suitable for larger dogs with thicker nails.
- Grinders: These are electronic tools that grind down the nail. They can be a good option for dogs scared of clipper noises.
- Styptic Powder: Always have styptic powder on hand to stop any bleeding in case you cut the quick.
For more articles like this one click here – How to Get Your Dog To Do What You Want: Your Ultimate Guide to Dog Training and Care
Effective Techniques
Mastering the techniques on how to get your dog to allow nail clipping is crucial for a successful grooming session. Proper technique not only ensures a quick and painless process but also minimizes the risk of injury. Let’s dive into the key steps:
- Hold the Paw Firmly but Gently: As you prepare to make the first cut, grasp your dog’s paw firmly but not too tightly. A gentle yet secure grip provides a stable base for accurate clipping, allowing you to cut with precision. Also, it reassures your dog and reduces anxiety. The manner in which you hold the paw sets the tone for the entire process, so ensure you start on the right foot, so to speak.
- Angle the Clippers: Proper angling of the clippers is essential for a clean, smooth cut. Position the clippers at a 45-degree angle relative to the nail. Cutting straight across or at an incorrect angle can lead to split nails and may cause discomfort or injury to your dog. Veterinary experts recommend this 45-degree angle to ensure that you don’t accidentally clip the quick, the sensitive part of the nail.
- Cut Gradually: Especially if you are new to nail clipping, it’s advisable to cut off small bits of the nail at a time. This gradual approach minimizes the risk of cutting into the quick. Plus, it gives you the opportunity to adapt and adjust your technique as you go along. Start by trimming just the pointed tip of each nail and gauge your dog’s reaction. If all goes well, you can proceed to cut a little more.
- Check for the Quick: Identifying the quick is vital to avoid causing your dog pain or bleeding. In dogs with light-colored nails, the quick is the pink section visible through the nail. In dogs with darker nails, look for a small dark circle in the center of the nail as you cut it gradually. If you’re unsure about the location of the quick, it’s better to cut less rather than risk injuring your dog.
- Use Positive Reinforcement: After successfully cutting a nail, reward your dog with a small treat or affectionate patting. This helps create a positive association with the nail clipping process and encourages cooperative behavior in future sessions. The American Kennel Club advocates using treats and positive reinforcement to train dogs for grooming and other activities.
- Assess and Adjust: After cutting a few nails, take a moment to assess. If you notice any signs of stress or discomfort in your dog, consider taking a break before continuing. Listen to your dog’s cues; their behavior can provide valuable feedback on how you’re doing and whether you need to make adjustments to your technique.
- Final Inspection: Once you’ve cut all the nails, inspect them for any jagged edges. Use a nail file to smooth any rough spots, making sure the nails are comfortable for your dog and won’t snag on anything. The finishing touches may seem minor, but they contribute to a more comfortable and positive experience for your dog.
Common Errors and Solutions
Even when you’re well-versed in how to get your dog to allow nail clipping, you might encounter some roadblocks. The good news is that most of these issues have straightforward solutions. Let’s explore some of the most common errors and how to address them:
- Overcutting:
Cutting into the quick is a common mistake that can result in pain and bleeding. If this happens, don’t panic.
Immediately stop clipping. Apply styptic powder or a styptic pencil to the affected nail, pressing firmly for a few seconds to ensure the bleeding stops. If you don’t have styptic powder, cornstarch can also work in a pinch. Once the bleeding has stopped, avoid further clipping and give your dog some time to recover. - Restlessness:
- If your dog seems restless or uncomfortable, there are ways to make the process smoother.
- Pause the clipping process and allow your dog to calm down. A few minutes of break can make a difference.
- Engage in some play or give your dog a treat to distract them.
- If restlessness persists, consider splitting the session into shorter, more manageable segments.
- If possible, have another person assist by holding your dog still or offering treats for positive reinforcement.
- Fear:
If your dog remains fearful despite your best efforts, professional help may be needed.
- If your dog’s fear seems severe or irrational, it might be beneficial to consult with a veterinarian.
- Your vet may recommend desensitization techniques or, in extreme cases, sedation options for safer clipping.
- If you’re uncomfortable with the process, a professional groomer is always an option. They have the expertise to handle fearful dogs and can often complete the task quickly and efficiently.
Conclusion: How to Get Your Dog to Allow Nail Clipping
Getting your dog to allow nail clipping can be a hassle-free experience with the right preparation, tools, and techniques. The key is to make the process as comfortable as possible for your canine friend while giving you the control you need to do a good job.
